
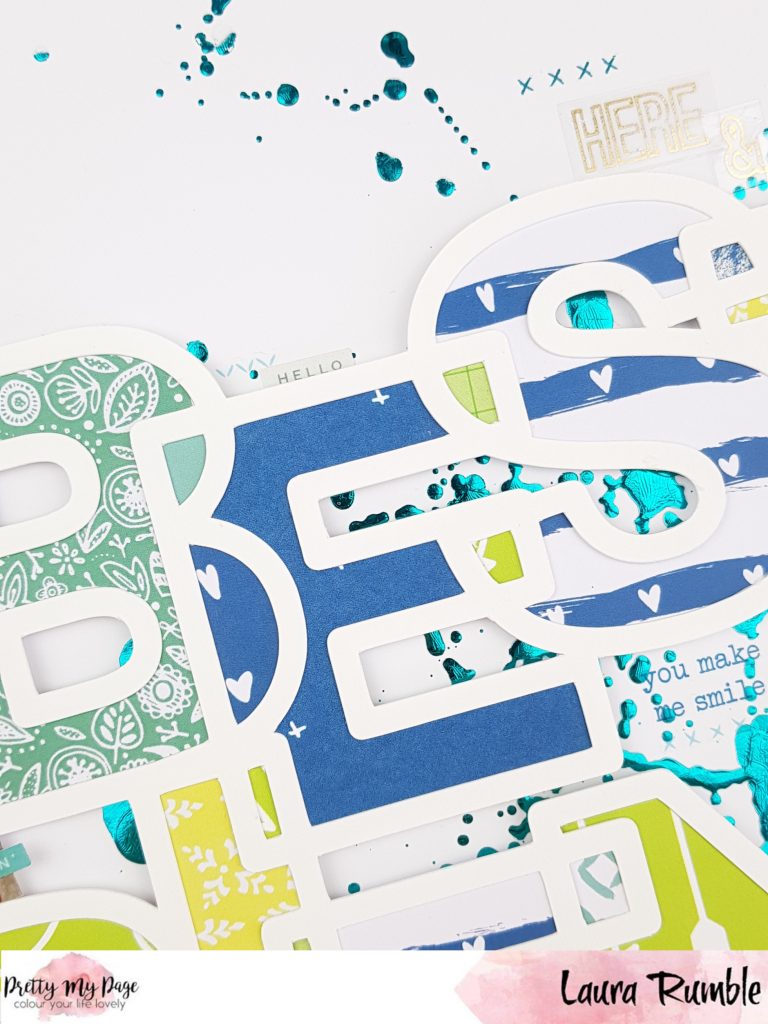
Hi guys, Laura here with a layout using Paige Evans’ Best Friends pre-cut file. You can grab it pre-cut in black, white or cream here. You can also buy it prepared for hand sewing… but I just don’t have that much patience!!
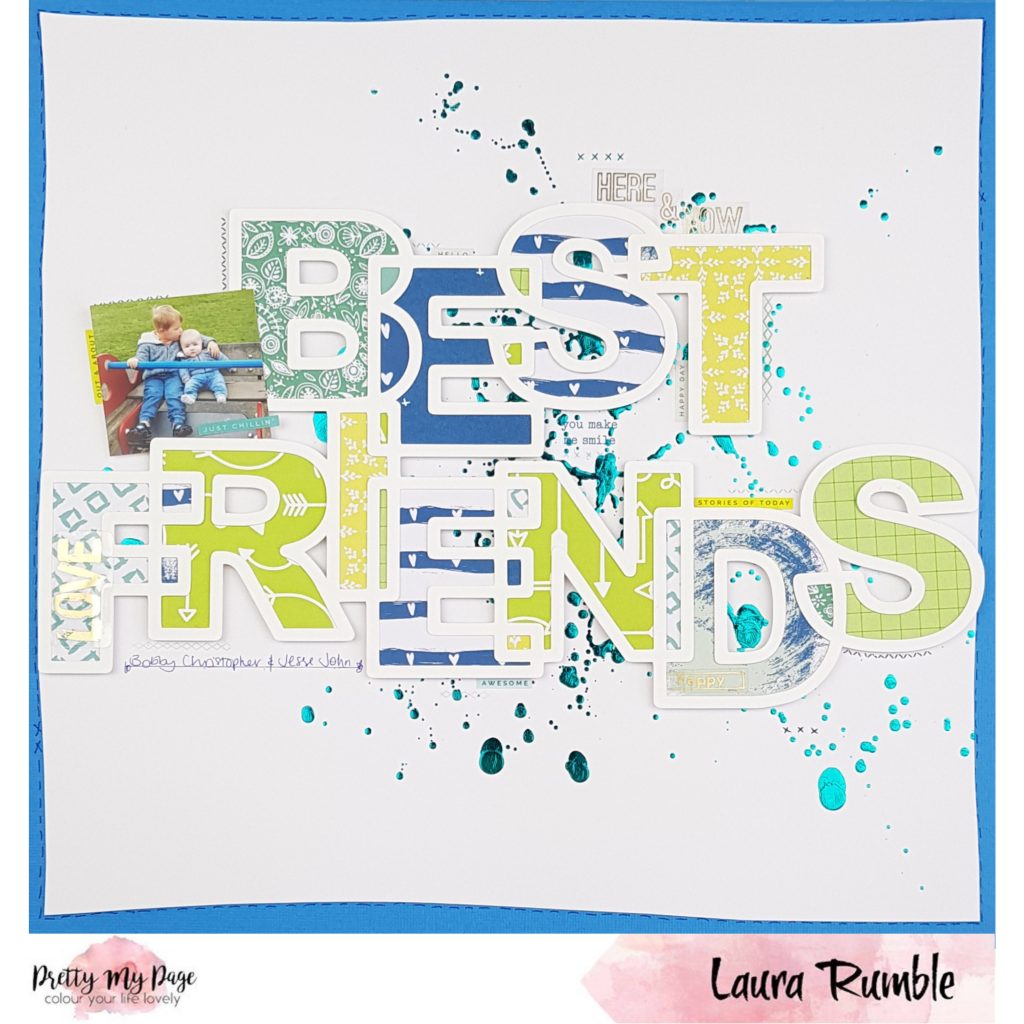
I’ve gone the classic route of backing each section with different patterned papers. My preferred method is assembly line. I cut all the pieces first, laying them out on my desk in the order they will be used.
I then add tombow mono multi glue to the back of the cut file and adhere the patterned paper pieces. I find this method quicker than cutting and gluing one piece at a time. Most of these pieces of patterned paper were project life style cards from my Quirky Kit with a few old off cuts from 12×12’s mixed in.

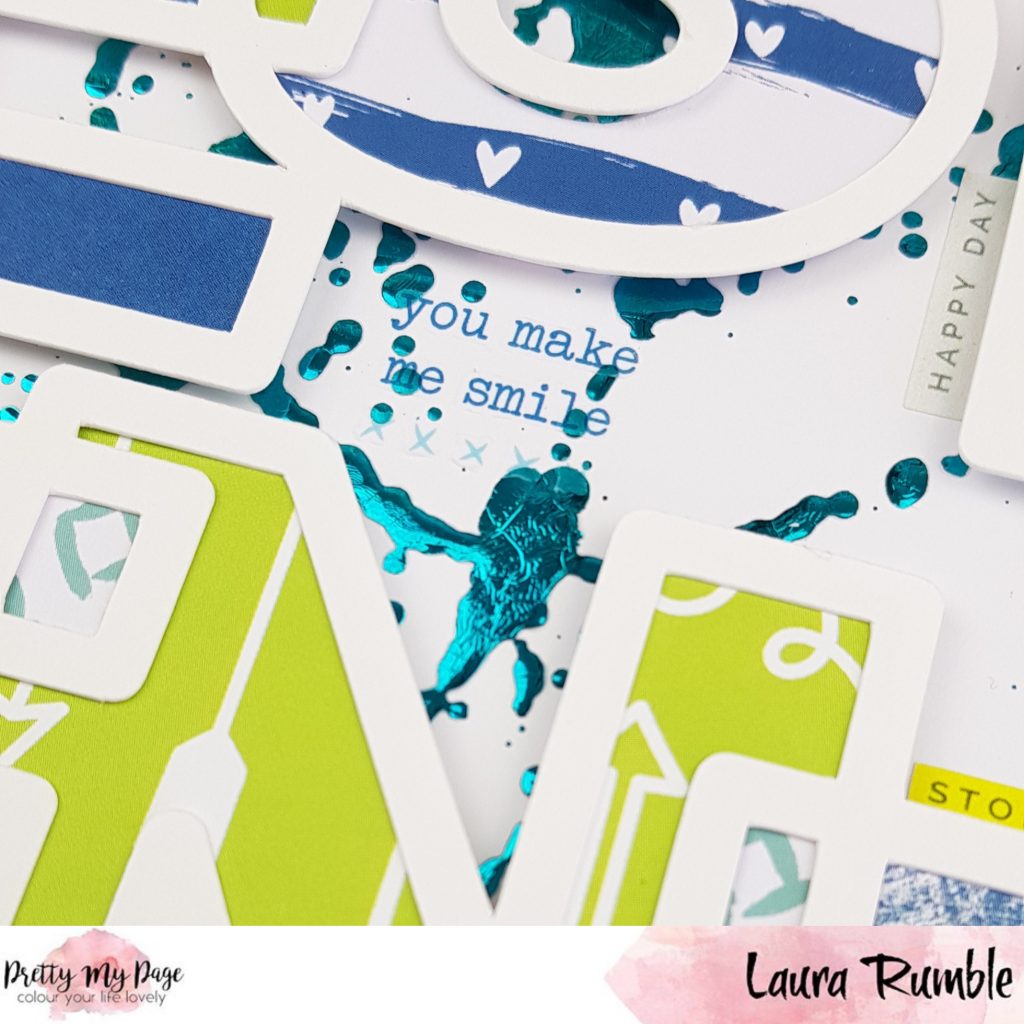
I’ve used a background from my last Minc-ing session. I’ve used the Minc Reactive Mist on a 12×12, allowed it to dry and then run it through the Minc with some teal foil. It pained me to cover some of it up with the cut file but that’s what the page needed! I made a slight booboo when sticking my cut file down. It was wonky and not in a way that looked natural. To remedy this I hand cut wonky slices off each side and backed the smaller piece onto a blue 12×12 sheet of card. I added a drawn line of dashes mimicking hand sewing around the edge. Much much quicker than me adding hand sewing and it gives a similar effect.

Because of the foiling I didn’t want to use sequins or enamel dots as I thought they might detract from the shininess. Instead I used a selection of little word stickers and a few rub ons that look like little stitches. (Again, this is much more my idea of hand sewing!)
You can find the process video here.
576 /
Hey All,
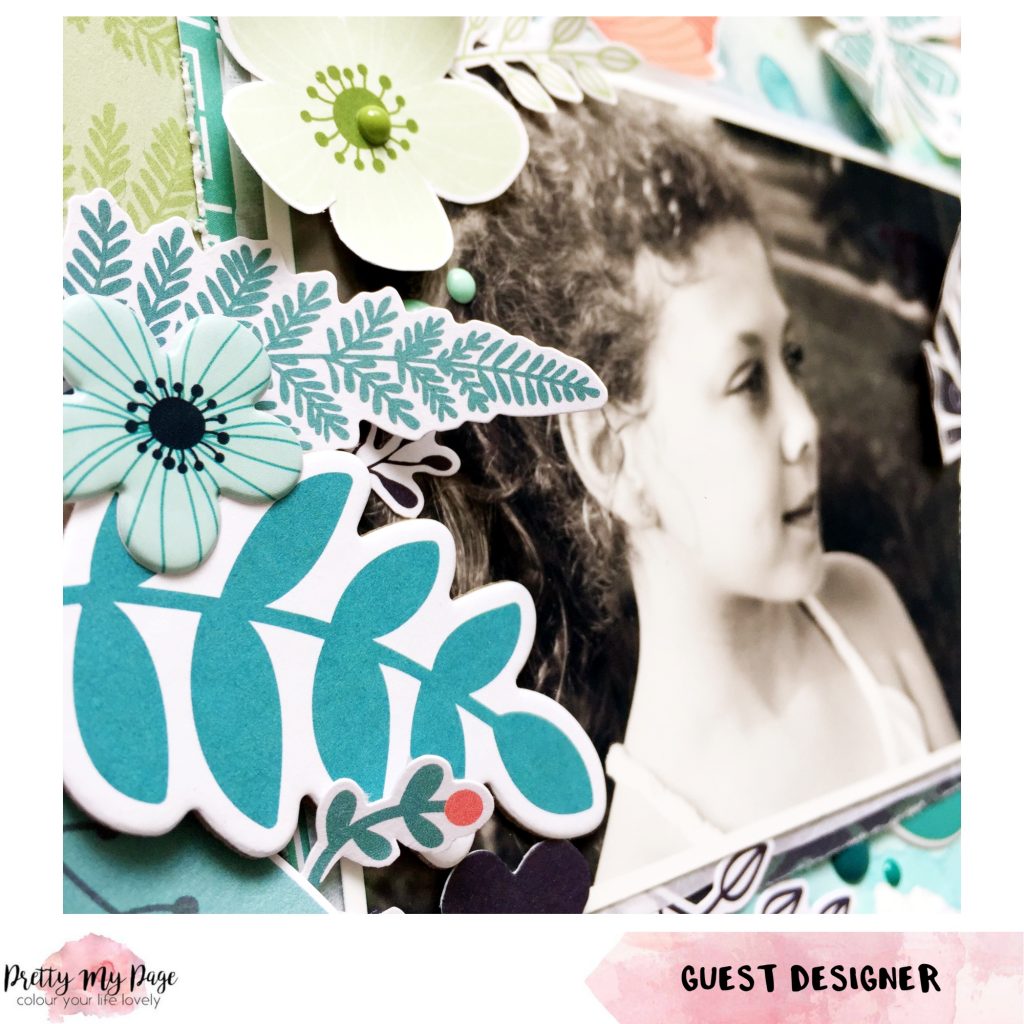
Sarah with you today! I have created this page using the lovely Pretty My Page Spokes Screen cut file (digital or pre-cut available from the shop).

I resized it a little so that I had a small amount of the background paper around the outside. I chose the Fresh Flowers paper from Shimelle Sparkle City and stuck the cut file to it using foam pads. I mounted my photo on two patterned papers from Paige Evans Horizon and tucked the Love tag from the same collection under the photo. I added the flower cluster die cut to the top left of the photo to balance it.

I used some of the manufacturing strips from two of the patterned papers and stuck to the top of the page and a bunting sticker from Dear Lizzy It’s All Good collection and a tiny word sticker from the same collection. I also added a layered camera sticker to the photo cluster from the same collection. The title is an old Thickers collection!
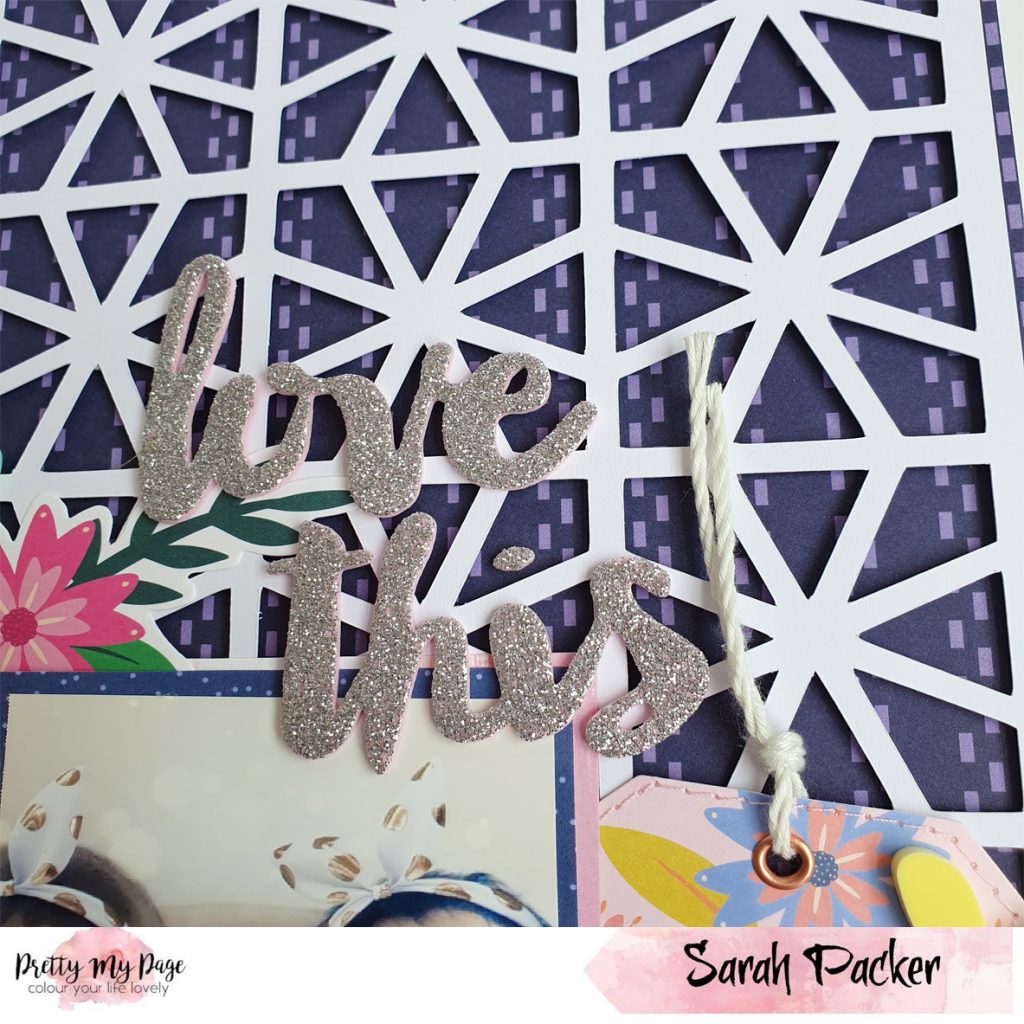
I then finished off with a charm from Maggie Holmes Sunny Days and a couple of Bramble Fox Perspective hearts.
I really love how the cut file really stands out from the dark background!
Love,
Sarah
508 /
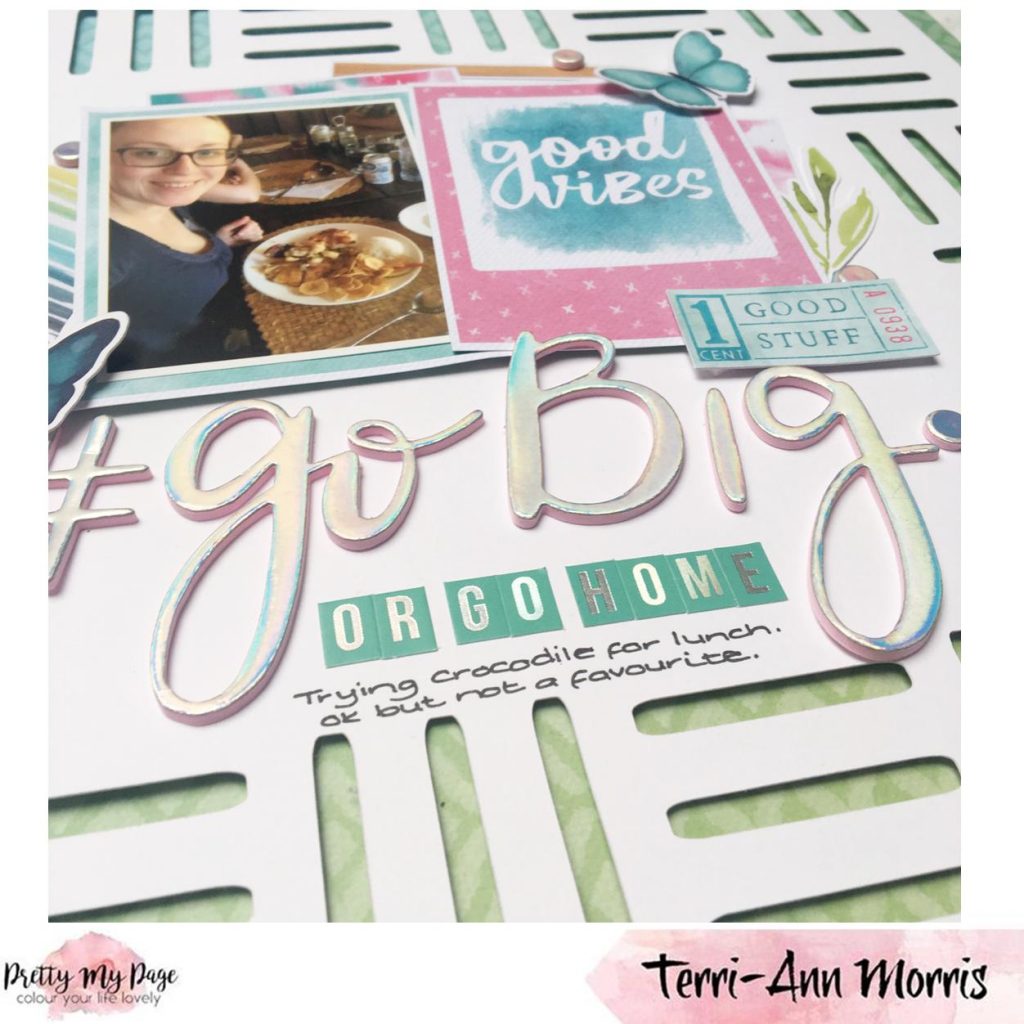
Terri back, this time using a cut file as a title. This “Let’s Go!” cut file (digital or pre-cut) screamed for me to back the open spaces with patterned paper.
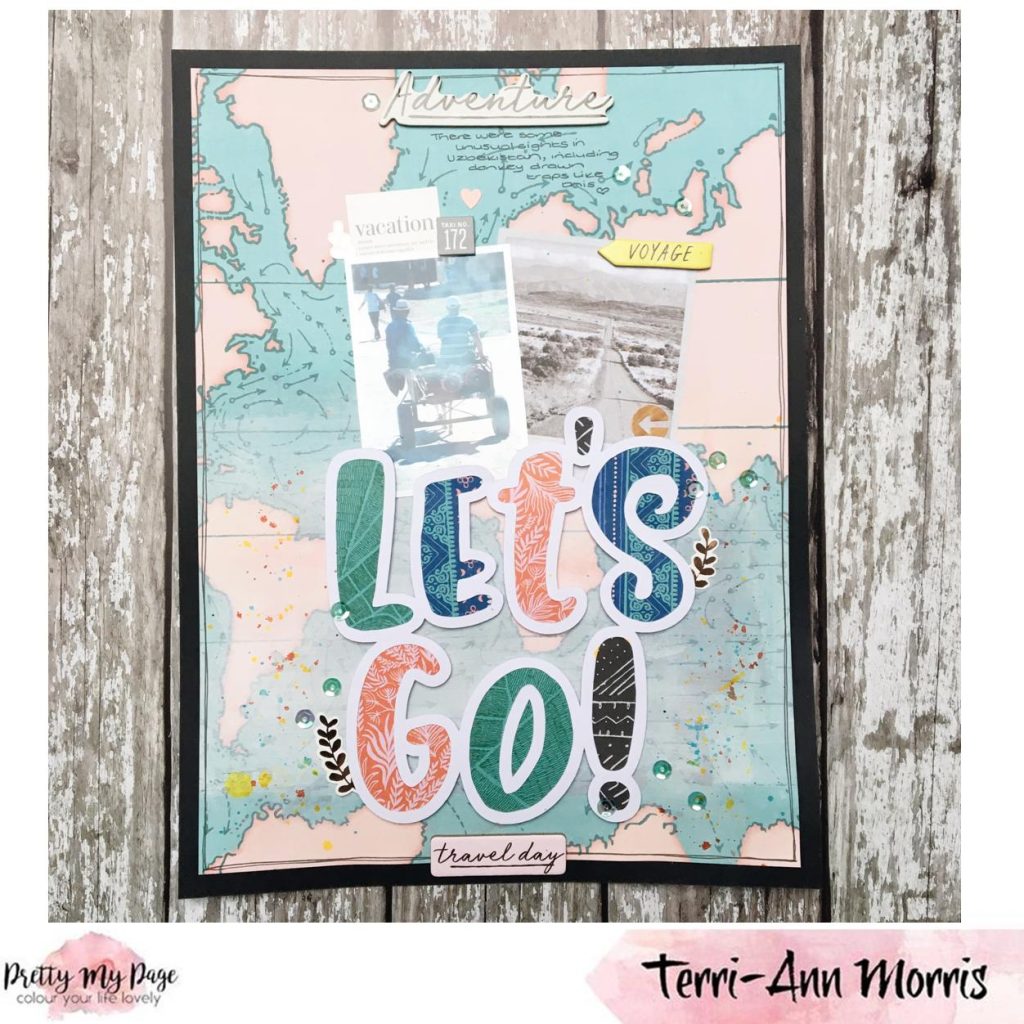
Backing the letters like this is a great way to use up some scraps and include lots of the colours from a particular collection. Unusually for me, this is a 9 x 12 layout. It’s great to try something different once in a while and I’m desperate to finish my Uzbekistan album that been on the go for a few years now.
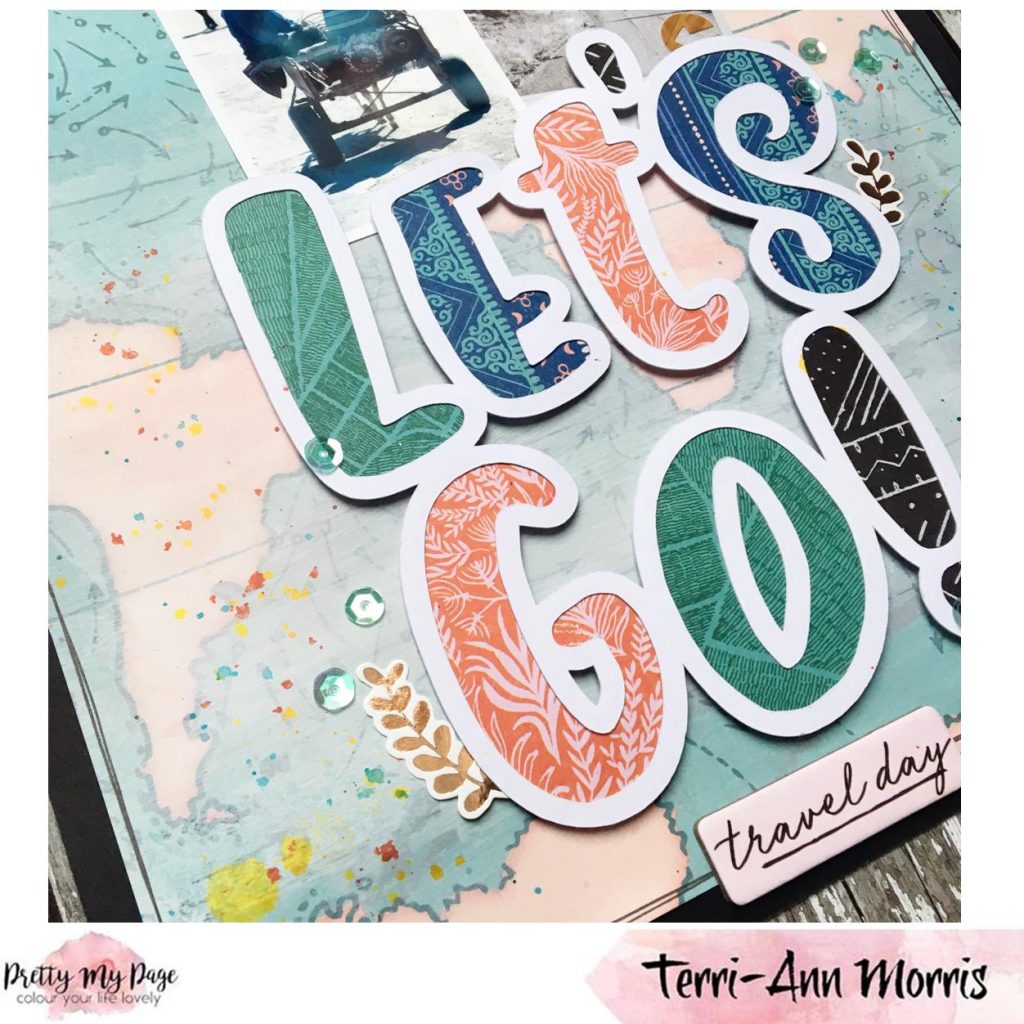
I added gesso to mute the busy background paper slightly which is a great way of using a really striking paper without it being overwhelming. I also added some splashes of paint underneath the title. These two techniques together help give a lot of interest and dimension to the layout.

Don’t forget to tag us in any creations using Pretty My Page Cut files.
Happy Scrapping!

447 /
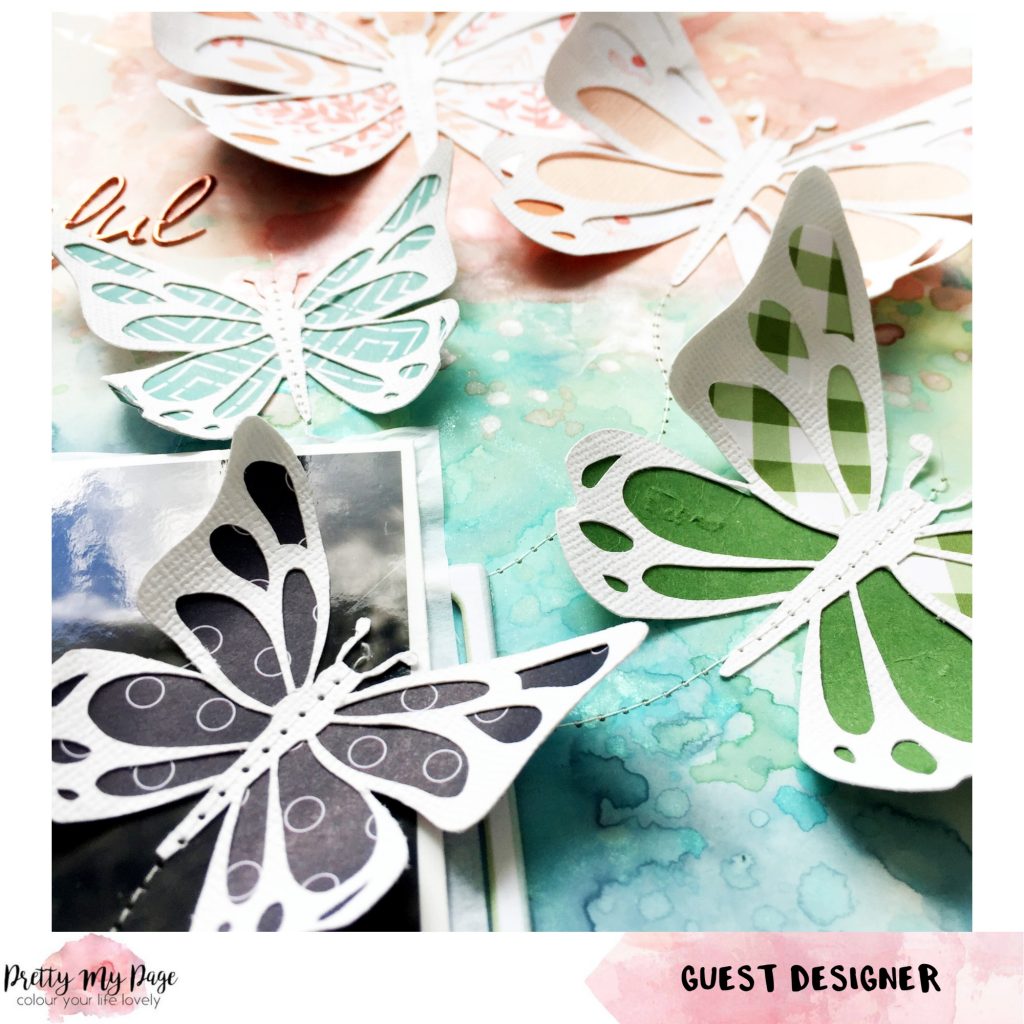
Hello everyone ! My name is Sophie Delorme and I am very honored to share my layout as a guest designer for Pretty My Page this week !

I used their gorgeous large butterfly cut file and one of the pink Fresh Studio collections called “Be You”.
I first did a mixed media background with some Distress Oxide inks using the packaging technique. Then I copied and cut the cut file five times in different sizes on my cutting machine and backed them with some pattern papers to match my background.
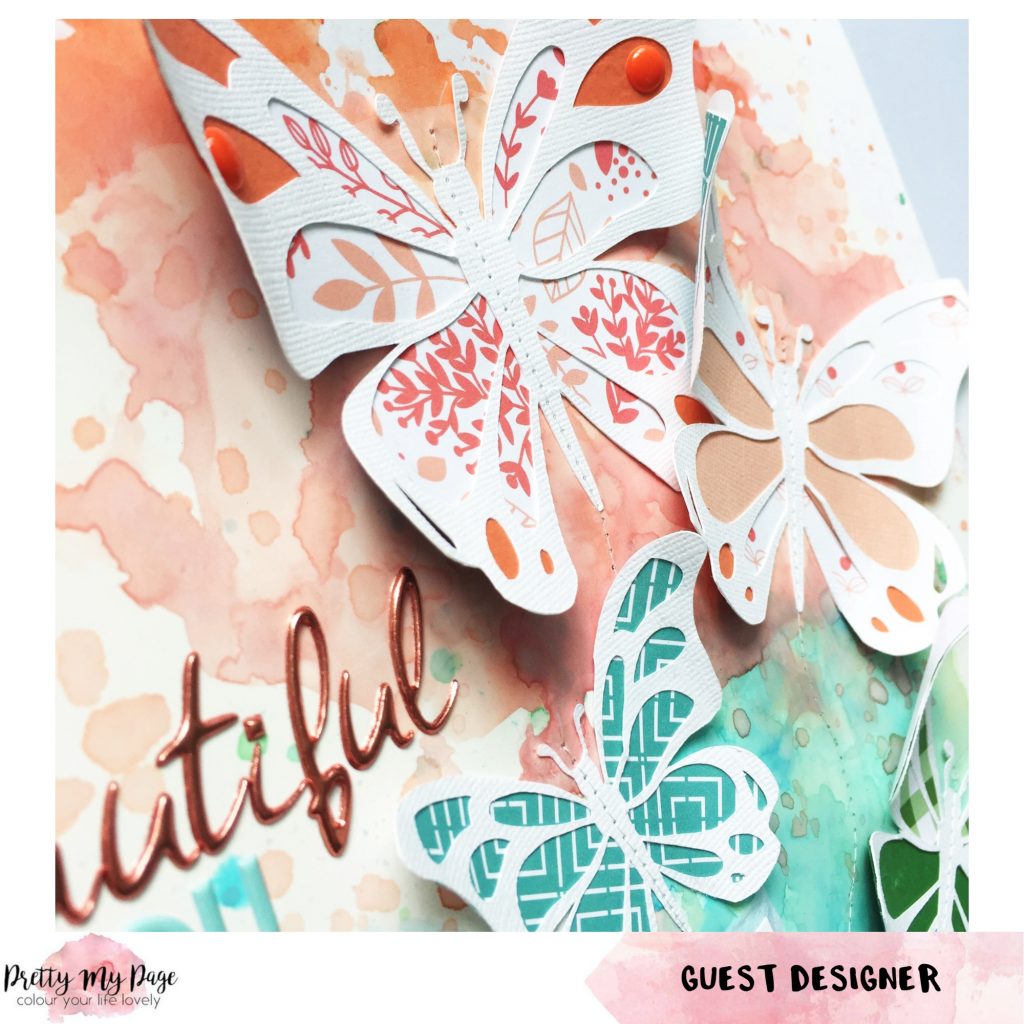
I stitched through the center of each butterfly with white thread and curled their wings a little bit.
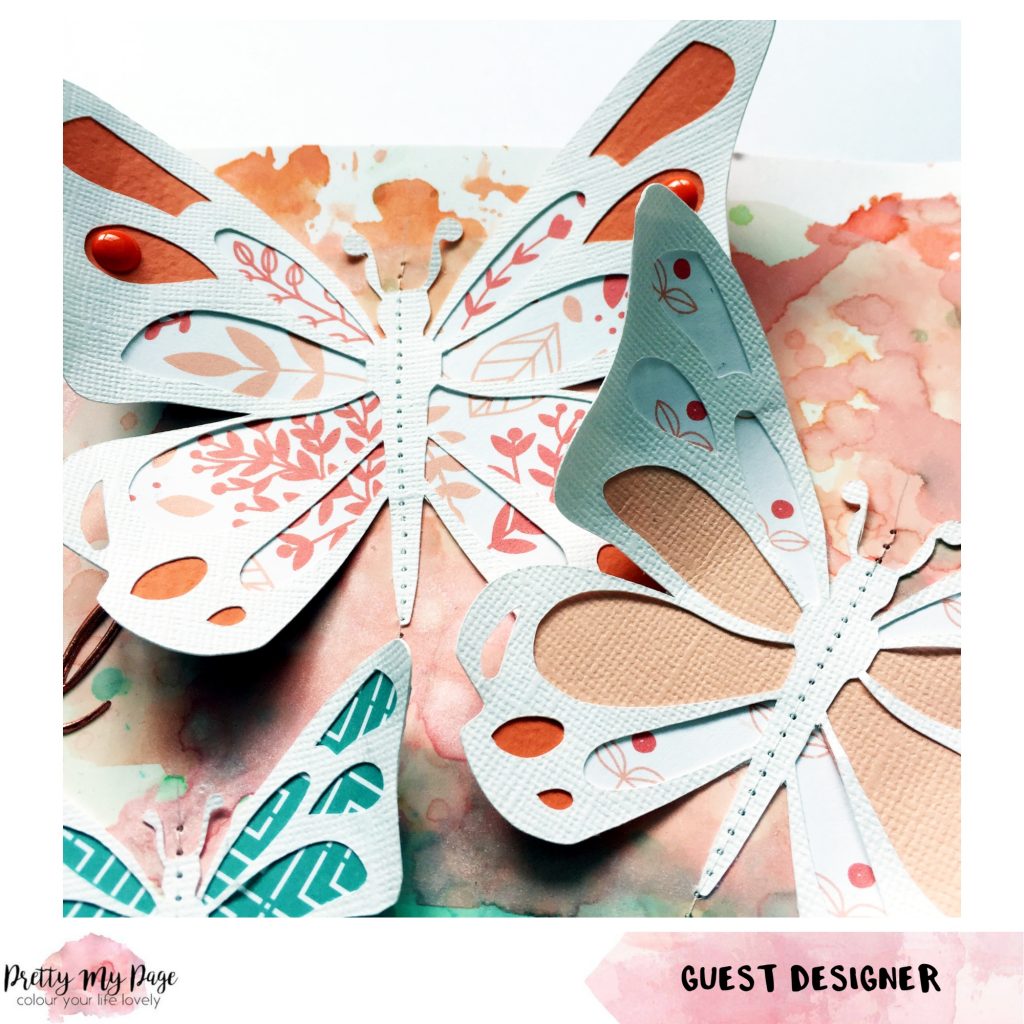
Finally I added beautiful flower and leave embellishments, my title and handwritten journalling to finish it up.
I love how it turned out and hope you do too! Those cut files are so inspiring, no doubt that it’s a starting point to the creation of little pieces of art!
Thank you for passing by and I wish you all a great day !
752 /
Hi guys, Laura here today. I do love a cut file that you can use over and over and not get bored with it. For me Rainbow Mesh is right up there with my most used cut file. You can find the pre-cut version here.

Today I’ve used half of the cut file. I sliced off three rows of rainbows in Silhouette Studio before sending to cut. I get the main file on one patterned paper and the outline on another. When stacked together I think they look fab. I considered using them upside down as scallops but saved that idea for another layout.
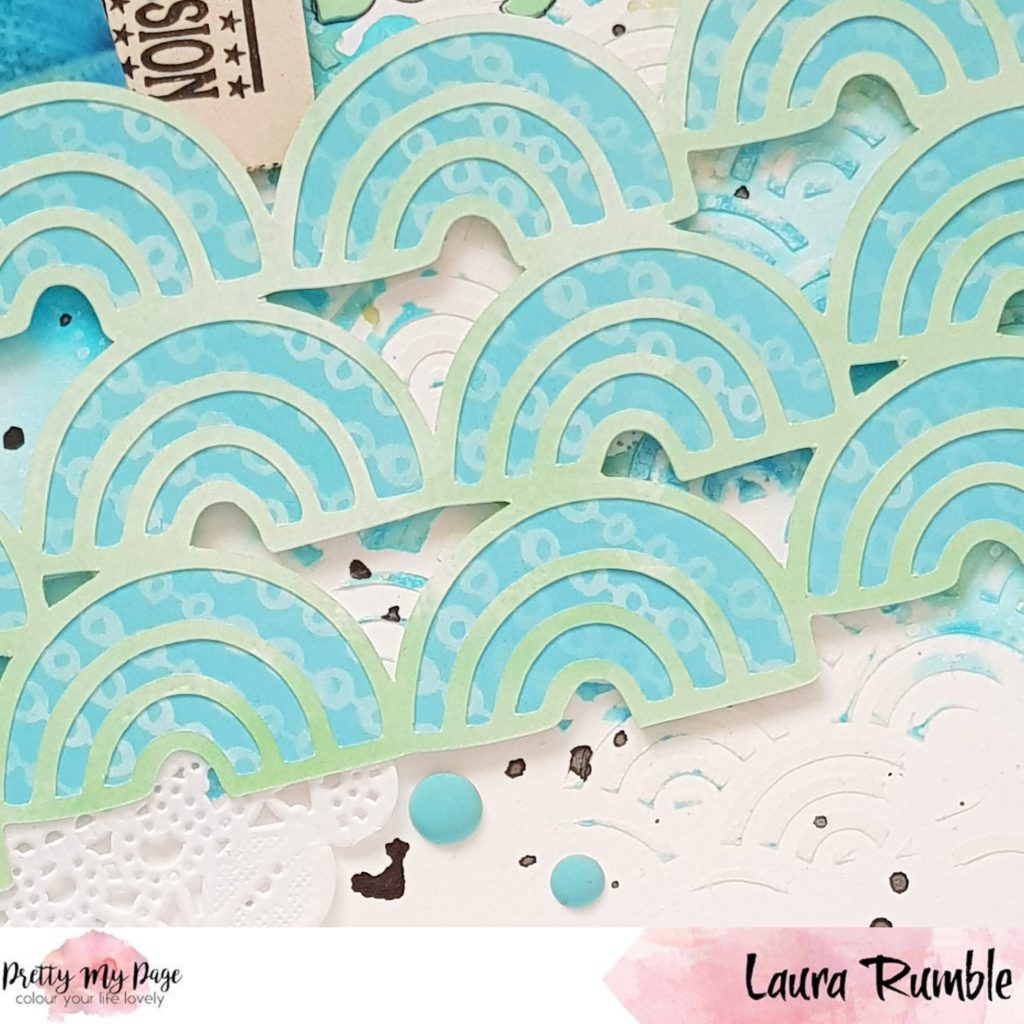
I used quite a few bits from the shop in this layout too. The layering pack (coming to the website soon), Distress Oxide ink, Dylusions ink, a stencil that matched the cut file and my favourite matte enamel dots. In the layering pack are some tickets that have admission on them. I decided to play on this and made my title “Welcome to cute! I will be your guide”. I love to add fun titles – when I can come up with them!!

A quick tip – the Dylusion inks mix really well. If you have the white you basically have a secret weapon in your stash! It will mix with any of the other inks to make a beautiful pastel shade. If your background mixed media gets a bit too much, too bright, too saturated, pop a few spritzes of the white over the top and to tone it down slightly.
That’s all from me today. I’ll be back later in the month with a couple of layouts using the Paige Evans pre-cut cut files.
1050 /
Hello lovelies,
Sarah here, sharing another layout featuring another fab cut file by Paige Evans, Haunted House (available pre cut in Black, White or Cream cardstock)

I’m a big fan of Halloween and had a few photos my daughter that I took last Halloween with the spooky filters on Snapchat!
I had the background paper in my stash and must admit to hoarding it for a few years so decided I would use it for this layout! I backed the cut file with orange cardstock and mounted it on foam pads to give it some dimension on my page. I am still using up the lovely Vintage Halloween by Simple Stories collection, it seems to be going on and on!

I layered my photo on a sheet of the patterned paper and raised two of them on foam pads and overlapped them over the middle photo and added some of the die cut pieces each side of my photo cluster and instead of adding a title, went for the die cut piece that says The Boo Crew. I then added some white ink splatters and some black enamel stars. I wanted to add a few elements to the houses, so I tucked a couple of die cut pieces behind the fence! I then finished it off with a couple of Bramble Fox Perspective bats.
Hope you like it 🙂
Love,
Sarah
489 /
Hi All,
Sarah here with you to show you a page I made using the very dreamy Star Swoosh cut file (also available as a pre-cut file here).
I thought it would work really well with the beautiful background I chose from Shimelle’s Sparkle City collection. I backed the cut file with more of the patterned papers from Sparkle City and raised on foam pads. I layered my photo on two of the patterned papers I had used on the cut file and tucked it under the largest star.
Once the photo and cut file were in place I then added a few of the holographic stars and title from the Sparkle City stickers and Thickers and embellished with a puffy sticker, cloud ephemera and tiny word stickers, again from Sparkle City (yes, I’m a little obsessed by the collection!?)
Hope you like it! See you soon xx
545 /
Hi, Terri here with a scrapbook page with the main element being the ‘lined border’ cut file (the pre-cut option is here). I reduced the file in size slightly to give a border of patterned paper peeking through.

Adding a cut file like this creates a focal point for the layout meaning that there doesn’t need to be a massive amount of embellishment. I have only used one sheet of patterned paper for this layout. I gutted the middle of the paper and used it to back the photo.

Finally I just a few added dies cut pieces from the Cocoa Vanilla ‘Happiness’ ephemera pack.

I’m loving using a mix of different alphabets to create my title at the moment. The mix of different styles, font and sizes makes for a really interesting title.
Don’t forget to tag us in any creations using Pretty My Page Cut files.
Happy Scrapping!

744 /