
I just love it when there is the most perfect cut file to suit a photo that I’ve taken. As soon as I saw the umbrella cut file I knew immediately what photo I was going to use with it.
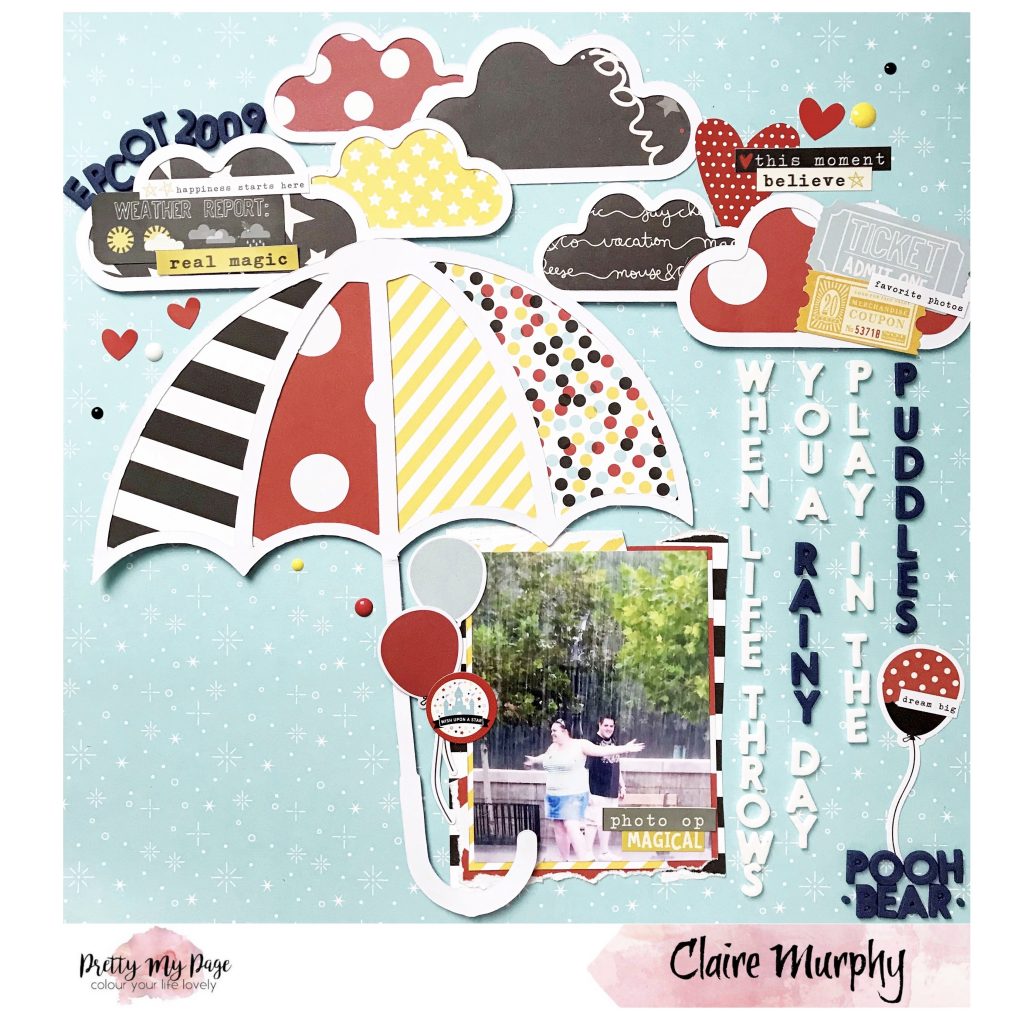
We had been holidaying in Florida for 3 weeks and it was disgustingly hot and it was 100% humidity and so the day it rained, I just ran out into it. It felt like heaven. My mum managed to grab a photograph of me and James stood on the pouring rain and it’s one of my favourite photos and brings back some amazing memories from that trip.
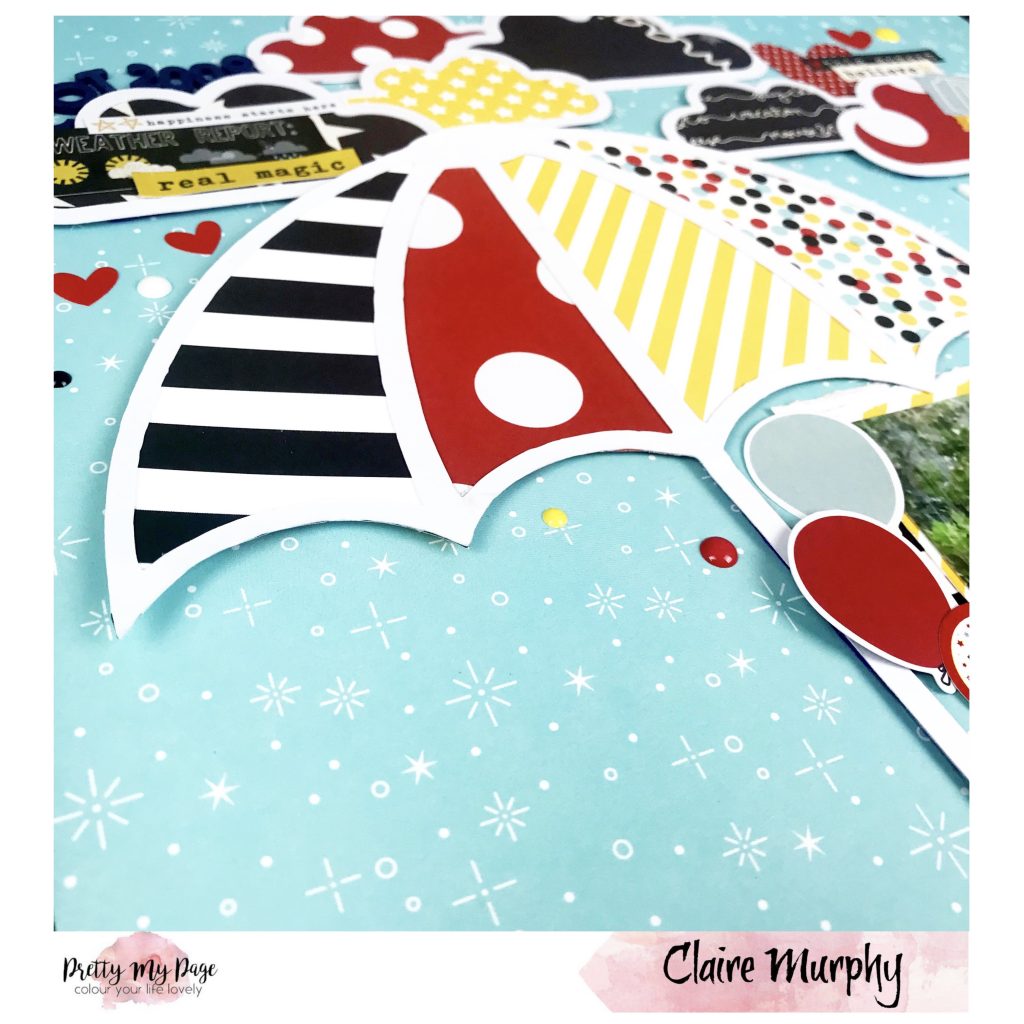
I wanted to make the layout complement the rest of my Disney albums and so I had to use all of the Disney collections of course!! So I started by backfilling the umbrella and clouds cut files with off cuts of patterned paper (which is always a great way to stash bash!). And applied some fun foam behind these to give them lift and dimension. This helps to create a natural shadow underneath each cut file and really adds to the layout.
I then used the same off cuts to layer underneath my photo and I used a mixture of cutting and tearing techniques for this.

The cut file did most of the hard work for me and so I really didn’t need to add too many embellishments on but I did add in some stickers and pops of ephemera to bring it all together.
Who doesn’t love a Disney layout?! You can watch the layout come together here.
506 /
Hi, Laura here today, working with the Diagonal Stars Pocket filler cut file.
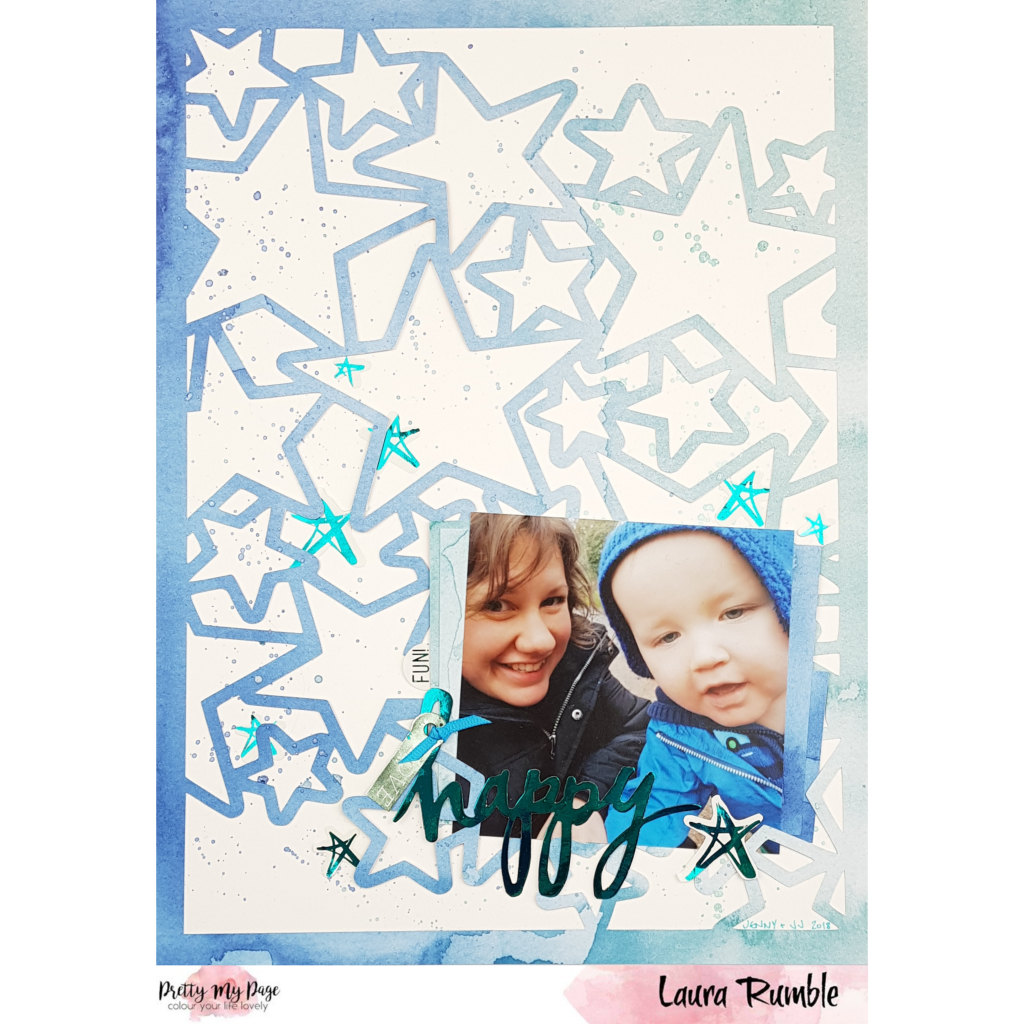
I’m a big fan of this cut file. It’s listed as a Christmas file and was intended to be a 6×8 December Daily page… but that’s not what I’ve used it for. I have increased the size to 9×12 and cut it on a gorgeous blue to turquoise ombre watercolour paper from Cocoa Vanilla Studio. I bet you can’t tell it was designed as a Christmas file!

As with most background cut files I feel the file does most of the work and makes the rest of the creating very simple. I added a few splatters in matching paint colours.
I’ve added a few faux layers to my photo and tucked it in amongst the stars. I used the off cuts from the 12×12 patterned paper I used to cut the stars from. There wasn’t quite enough left for full layers so I just tucked what I had at each side of the photo. No one will know it doesn’t run the length of the photo.

I foiled some Heidi Swapp star stickers, a word and a tag as my embellishments. I use a snippet of ribbon to tie the tag on to the riser of the h in the title.
The other great thing about this cut file is that you are left over with some stars. I’ve already started a layout with them. I’ll be sure to share it when it’s finished!
You can see the process video here.
611 /
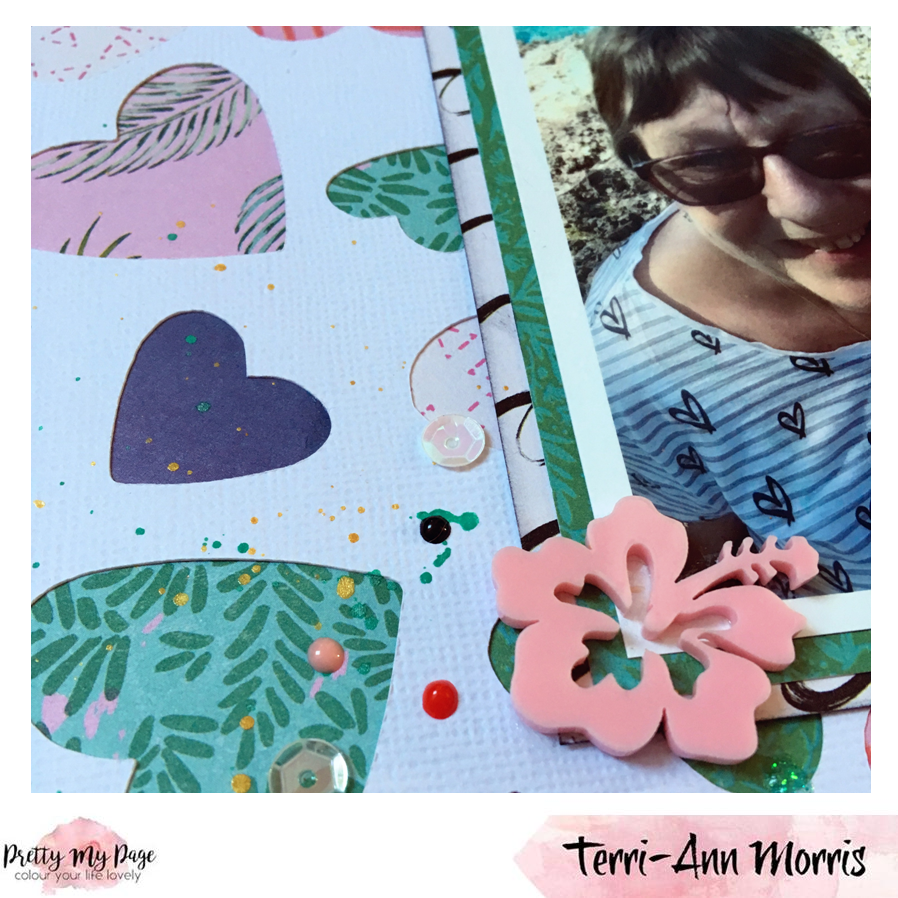
Terri here with my first blog post of the month. As we head through the month of love I decided to use the ‘Heart Border’ cutfile (digital version here) but with a little twist. Rather than paring it with a romantic themed photo or paper collection I have used it to document a photo from my recent trip to Cuba. This photo was our first glimpse of the Caribbean Sea, mum and I didn’t get in but you can see my fiancé photo bombing in the background.

I back filled the hearts in the cutfile with off cuts from a 6×6 paper pad from the Crate Paper Oasis collection. As I’ve mentioned before I’m desperately trying to use up some of my older stash. Its much easier to use my newer stash as I usually have more of the collection available to me. When you are down to a few pieces you have to mix in other collections and manufacturers which can be more tricky.

Back filling is one of my favourite techniques to use with cut files especially ones like this which are ideal as a background and starting off point.

The layout was finished off with a splattering of mist, a scattering of sequins, and nuvo drops underneath the photo mat and die cut embellishments. I plan to add journalling to the pink note paper once I’ve completed a few more layouts of my trip.
Thanks for joining me on the blog today. Don’t forget to share with us your layouts using Pretty My Page cutfiles by tagging us on Instagram and Facebook.
Happy Crafting!

576 /
Hi friends, it’s Claire here today sharing my layout using the Handsome cut file from Paige Evans. It’s great as not only does it serve as the main feature on my page but it also doubles up as my title and everything comes together fairly quickly.

I love to back-fill my cut files. The larger titles are much easier to back-fill. There are numerous ways to do this. Tracing around the letters or sticking your paper on and then cutting around it are 2 options. There is no right or wrong way and is just down to preference.
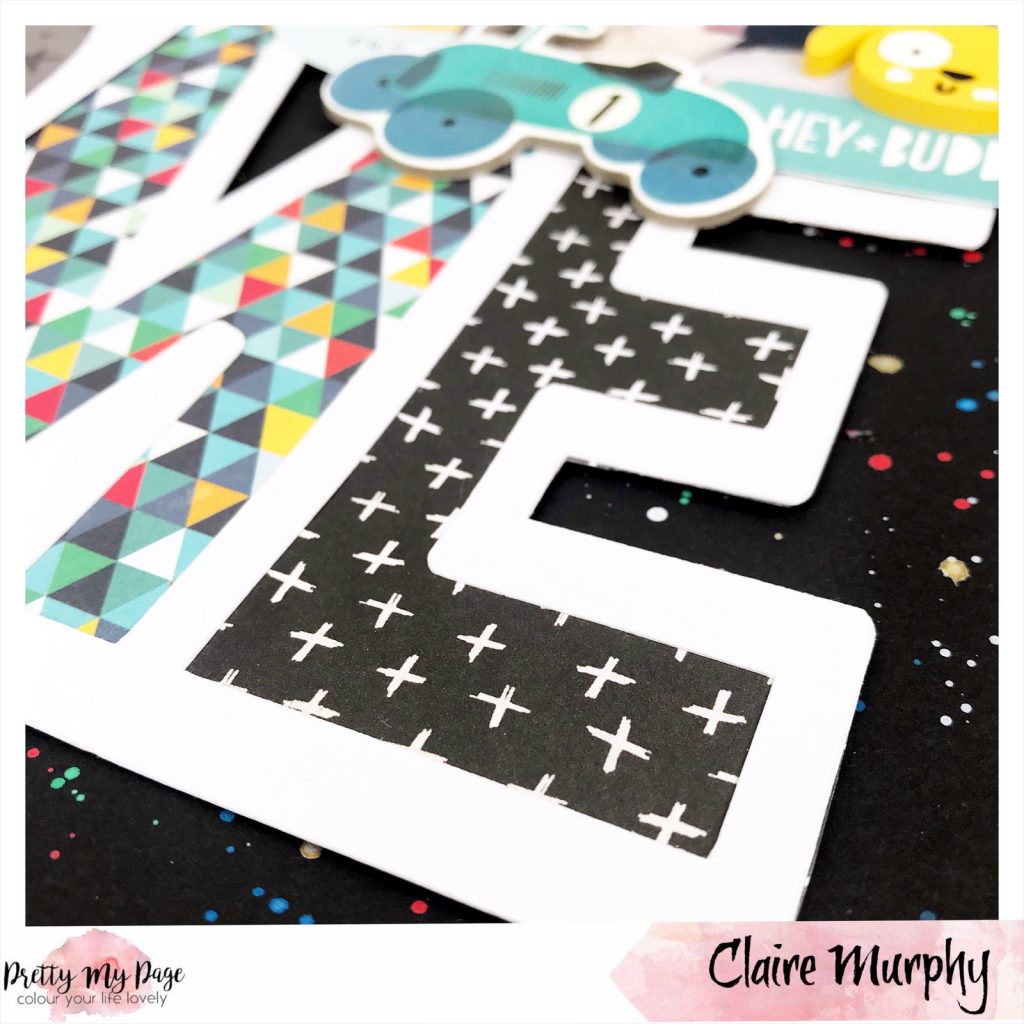
I decided to create a splattered background and this is best done on black cardstock for high contrast. I used some acrylic paint markers and a little water and splattered my paint around the edges. I love how this gives more detail to the page without distracting from the cut file.

I created 2 small Embellishment clusters on top of the cut file but you can still see that it says Handsome.
It took more time to let the ink dry than it did to pull the rest of the layout together! You can see the process video here.
544 /
Hi scrapping friends! It’s Tracy here today. I’ve used the graphic zebra cutfile for this page.

I re-sized it to 7 ½ square, duplicated it while on my cricut and turned it 45 degrees then welded it before cutting out on black card stock.

I knew I wanted to use greens and reds to back it to go with the colours in the photo but the only pad of paper I had with these colours was on called ‘Tropicana’ by Simply Creative. Tthis photo is totally not a tropical one (new years eve in fact!) but I wanted the colours, I think I’ve got away with it!
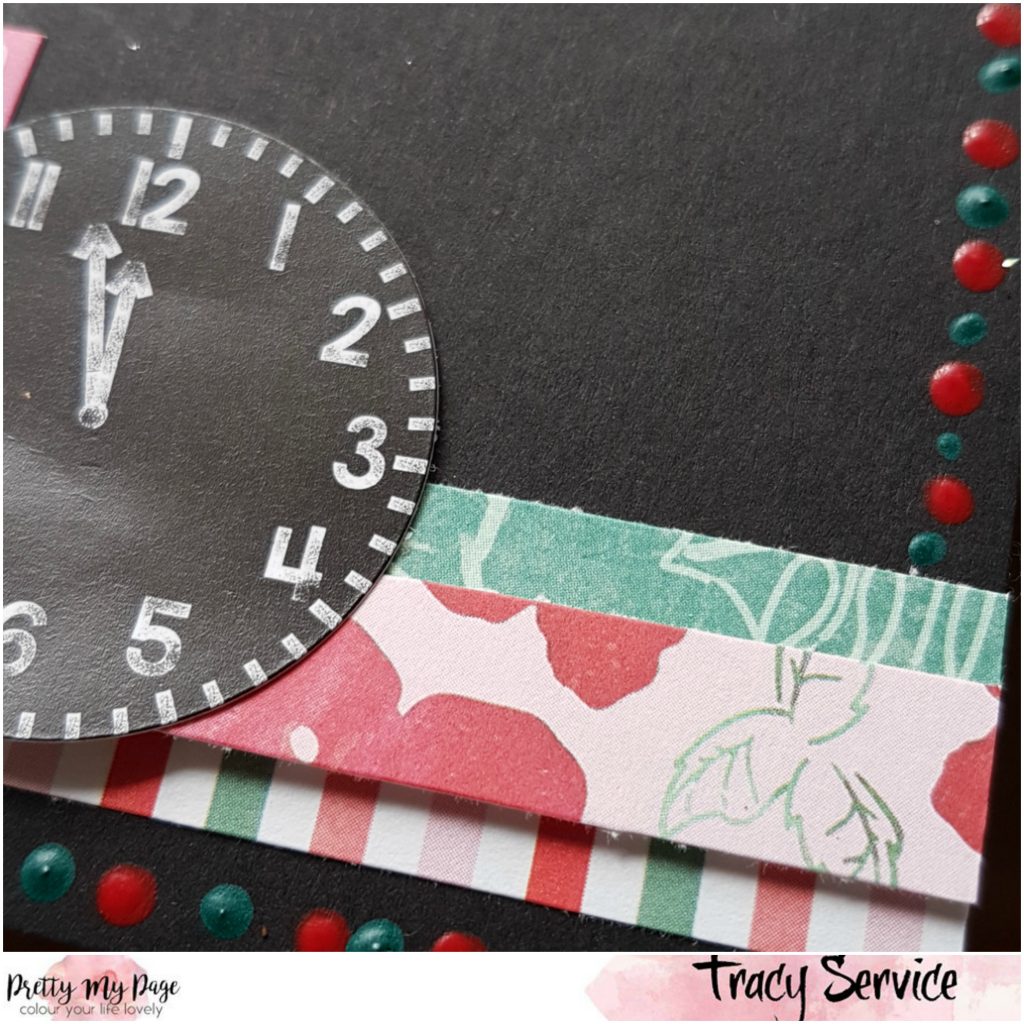
The stickers are from a sticker sheet I’ve had for a while called ‘Happy New Year’ by Simple Stories. I’ve used a nail art dotting tool and acrylic paints to make dots all around the edge of the page to bring the colours and sparkle together.
With love and colour!
485 /
Hi there, it’s Jane here. I absolutely squealed when I saw this pre-cut vintage caravan cut file called ‘Glamper’ by Paige Evans and it didn’t let me down.

Pairing this cut file with the scrumptious Midnight collection by CVS made for a beautiful combination. Each section is individually backed with papers from the 6×6 pad – the smaller patterns in these pads are perfect for using with cut files, and I have used a combination of clear stickers and ephemera in the clusters.
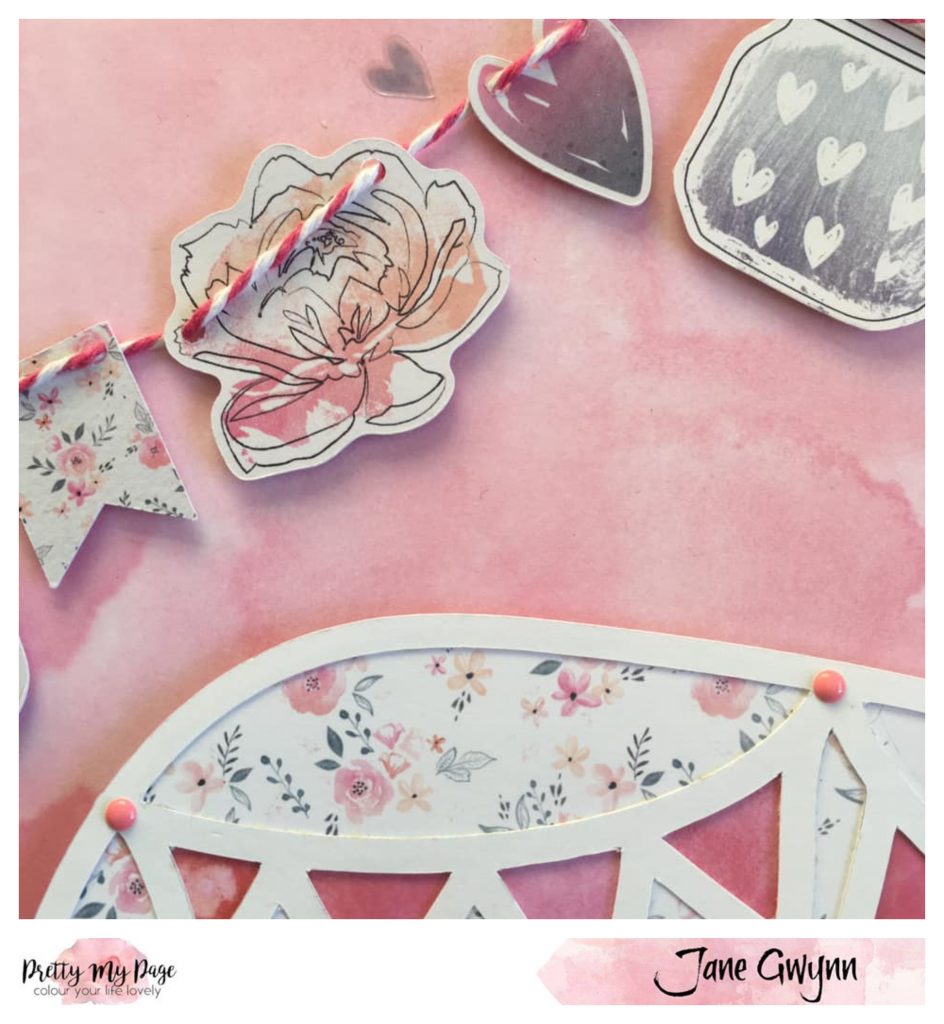
The title is also from the same range and I loved threading the bigger ephemera with twine to create more bunting and mimicking the caravan. It is mounted on foam padding onto pink watercolour paper and then on to white cardstock.

Many thanks for looking and have a happy day. xx
533 /
Hi Crafty Friends! Laura here sharing a layout made with a pre-cut file from Paige Evans. This one is called Ferris Wheel and you can buy it in black, white or cream or as a stitched template. I’ve used it here in white.

I cut very small pieces of white foam adhesive and place it on the reverse of the cut file and then mounted it on a white 12×12. I went for an off centred design. I’m quite picky and if I had attempted central and was a couple off millimetres off I wouldn’t have liked the finished layout! Deliberately going off centre takes care of that!
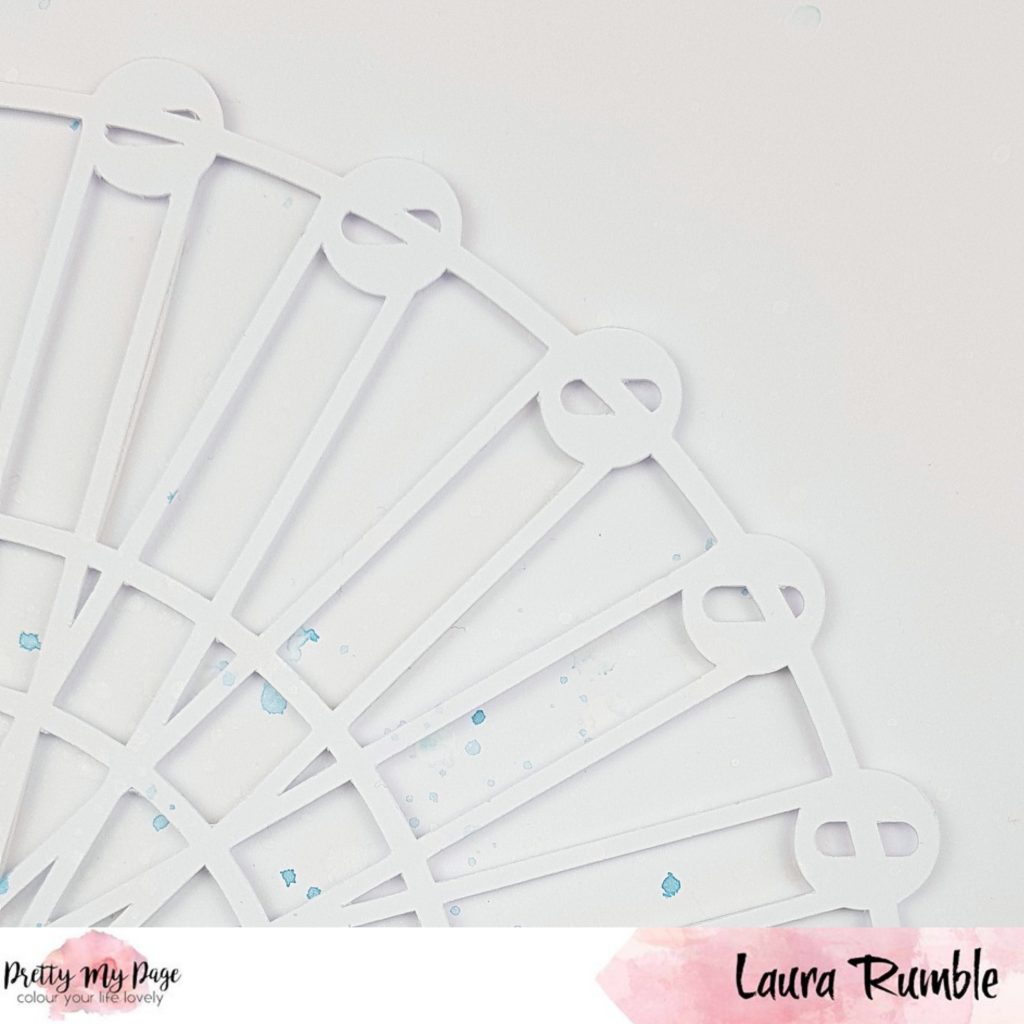
I had a mist and splatter session with a few white, blue and shimmery inks. I love the Dylusions in white linen. I love the subtlety of white on white on white. I carried on with the white theme by adding layers behind my photos.
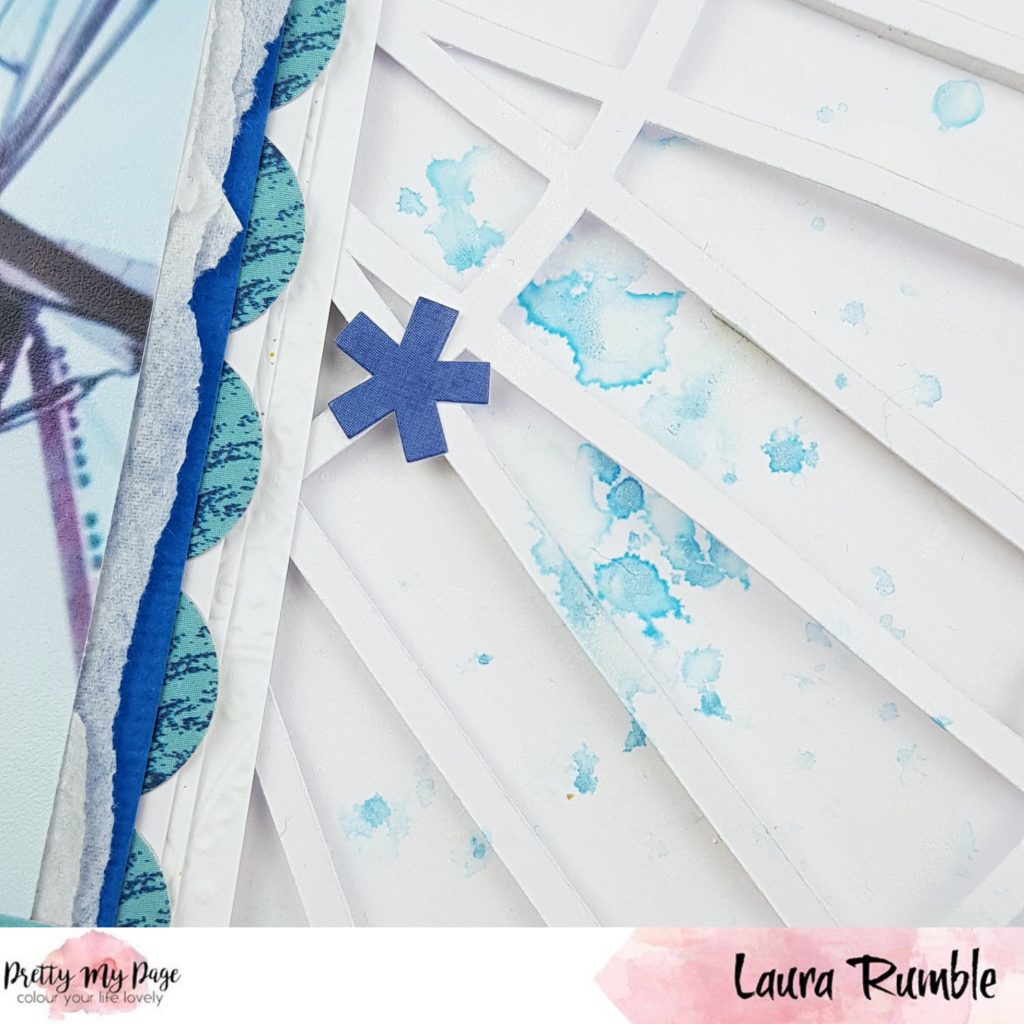
When using the same colour texture and finish is key. I’ve used shimmer and matte finishes with the mists and tissue paper, smooth, textured and embossed cardstock in my layering. I’ve also added in one blue layer in each photo cluster.

To finish off I added a title and several stickers in shades of blue. I like to tuck stickers in and around the photo clusters. When you can’t see the entire sticker it adds more depth to the page.
Thanks for looking!
507 /
There is nothing I love more than to go to the cinema. I don’t do it nearly often enough but it provides a great escape away from the hustle and bustle of life. So whenever I get the chance to go to the cinema I have to go.
When I saw the ‘Let’s Go To The Movies’ cut file (pre-cut here, downloadable here) I knew I had the most perfect photos to go with it.

So I decided to just use the filmstrip cut file as I wanted to include this in my Travellers’ Notebook. I backed the cut file with 5 photos and left one slot to add a title in.
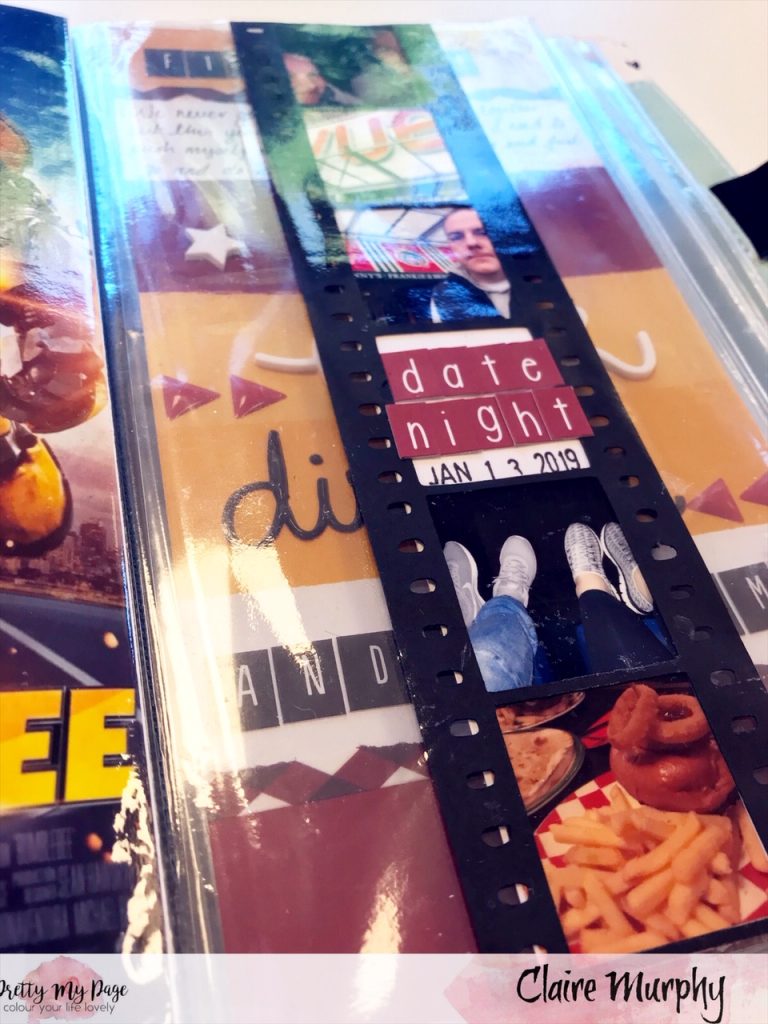
I then adhered this to some acetate to make it appear like it was floating in the pocket and backed the back of the cut file with some more patterned paper to cover the adhesive.

Something so simple and it has made my TN spread so unique.
I cannot wait to use the other parts of this cut file on other projects too!! You can find the process video here.
With love and colour.
471 /